How to Import Flights into Aviato
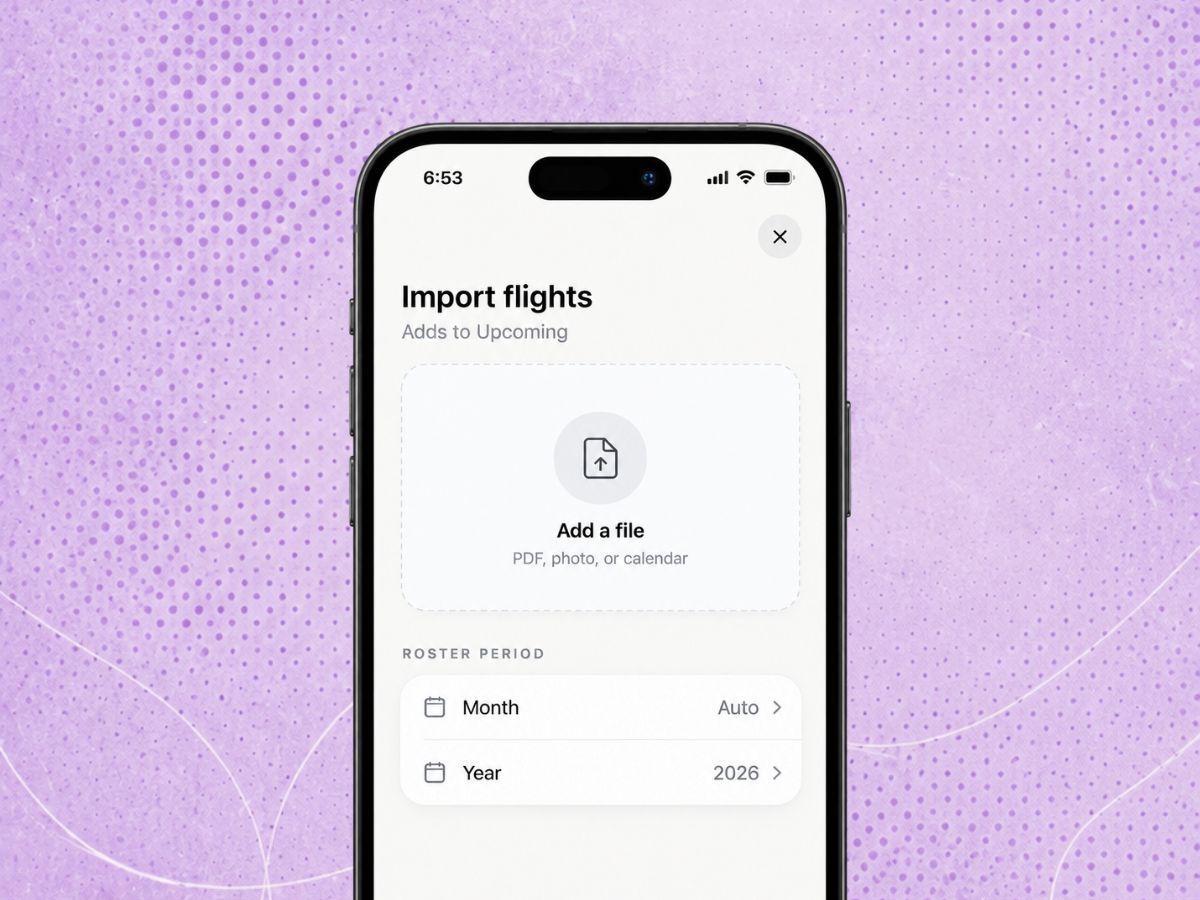
Import flights
If you already have your flights in a roster, e-ticket, or calendar, you don’t need to add them one by one.
Upload the file to Aviato and we’ll read the flight details for you. Once the import has started, it can carry on in the background while you use the rest of the app. We’ll let you know when your flights have been added to Upcoming.
What can I import?
You can import flights from a few different types of files:
Photos
Upload a screenshot or image from your photo library. Aviato supports JPEG, PNG, HEIC, and WebP.
PDFs
Upload an airline roster, e-ticket, or itinerary saved as a PDF.
Calendars
You can also import an ICS calendar file.
You’ll need to be online when you start the import, and files are uploaded one at a time.
How to import your flights
1. Open Import
Go to Upcoming Flights and tap +.
If you haven’t added any upcoming flights yet, you’ll also see an Import flights option on the page.
This opens the Import screen, where you can choose the file you’d like Aviato to read.
2. Add your file
Tap Add a file.
Choose Photo if your roster or itinerary is saved as an image, or File if you have a PDF or ICS calendar file.
When you add a photo, you’ll see a preview so you can check you picked the right one. For PDFs and calendar files, you’ll see the file name instead.
If you picked the wrong file, tap it again to choose another one, or tap X to remove it.
3. Check the roster period
In most cases, you can leave Month and Year set to Auto. Aviato will read the dates shown in your file and work out when each flight takes place.
Some rosters only show the day of the month — for example, 12, 13, 14 — without showing the month beside every flight.
If your roster looks like this, choose the correct month and year before importing. This gives Aviato the extra context it needs to place those flights on the right dates.
4. Start the import
Once everything looks right, tap Import.
You’ll see We’re on it when Aviato has received the file and started reading it.
There’s no need to keep the Import screen open while this happens. Tap Done and continue using Aviato as normal. Your import will carry on in the background.
5. See your import in Upcoming
While Aviato is working on the file, you’ll see an import card in Upcoming Flights.
The card will show that your flights are being processed, so you can come back and check on it whenever you like.
When the import is finished, the flights we found will appear in Upcoming and you’ll receive a notification letting you know they’re ready.
6. Confirm the airline if we need a hand
Most of the time, Aviato can work out the airline from the information in your file.
If there isn’t enough information to identify it confidently, the import card will change to Confirm airline.
Tap the card and choose the airline from the list, then tap Try again.
We’ll continue the same import from there, so you won’t need to upload your file again.
A few things that help
Clear screenshots and PDFs are easier for Aviato to read. If you’re uploading a screenshot, cropping out menus, messages, or other unrelated parts of the screen can help.
It’s usually best to leave the roster period on Auto. Choose the month and year yourself only when the dates in the file aren’t clear enough on their own.
Once you see We’re on it, the file has been handed over to Aviato. You can carry on using the app and we’ll let you know when the flights are ready.